Tiramisu
This is a traditional Italian tiramisu, made with beaten egg yolks and sugar (also called zabaglione), whipped egg whites, mascarpone, espresso and Savoiardi ladyfinger cookies. Although heavy whipping cream was not part of the original recipe, many new adaptations use heavy cream as a substitute for the eggs. Because of its simplicity and versatility many other seasonal ingredients can be used for your own adaptation of this creamy, delicious dessert; strawberry for summer, or add pumpkin to the cream in the fall. I hope you enjoy this recipe.
Prep time 30 - 45 minutes
Resting time 2 hours, but overnight resting is really the best if you can wait.
Makes 8 - 12 servings Depending on the size of your dish. You can use an 8” or 9” square pan, or a 8 x 10 casserole, which is what I used in the pictures here. If using a square dish, cut into 9 pieces. If using a rectangular one, cut into 12 pieces. They’ll be a little smaller, but still a good portion.
You could also make these as individual portions.
Ingredients:
4 eggs, separated, room temperature. Be sure to buy the freshest eggs you can.
Note: If you don’t want to use the eggs, you can substitute with a 1 1/4 cup heavy cream, whipped with 1/2 cup sugar, then combine it with the mascarpone until smooth. It’s delicious, but not a traditional Italian tiramisu. You can also buy pasteurized eggs which are fairly easy to find.
Tip: If you forget to take the eggs out ahead of time, put them in a bowl of very warm water and they will come to room temperature within a few minutes.
500 gr mascarpone
1 7 oz/300 gr package of ladyfingers/Savoiardi
2 Tbl liqueur (Kahlua, Amaretto, rum, brandy, marsala) optional
1/4 cup sugar, for egg whites
1/4 cup sugar, for egg yolks
1 Tbl sugar for espresso
1 cup espresso or strong coffee - Chilled (I used 5 Nespresso/Ristretto pods)
2 Tbl cocoa powder
dark chocolate is optional to shave over the top of the finished dessert
Preparation:
Note: You can watch me make this on my IG reel on my feed.
In a stand mixer, beat the egg whites to stiff peaks, adding 1/4 cup of sugar very slowly while the whites are getting fluffy. About 3 - 4 minutes. Note: stiff peaks means, you can turn the bowl upside down and the whites won’t move. After whipping the egg whites, transfer them to a large bowl and use the same stand mixer to beat the yolks. As long as you whip the whites first there is no need to clean the whisk or bowl.
In the same stand mixer, whisk the egg yolks with 1/4 cup sugar until they are pale, light and fluffy. About 4 minutes.
Add the mascarpone to the egg yolks in the stand mixer, on medium setting incorporating the cream until smooth.
Gently, fold in the beaten egg whites to the yolk/mascarpone mixture, until well incorporated. Set aside while you begin assembly.
Pour the cold espresso (or very strong coffee), 1 Tbl sugar and liqueur (if using) into a bowl to dip one at one time. Note: add sugar to espresso when it’s hot so it will dissolve
Have your serving dish ready and plan how the ladyfingers will be placed into the dish. It is best to have a snug fit, meaning not a lot of space between the ladyfingers. This will ensure a nice “cake” layer, which will be easier to cut.
Dipping the ladyfingers in the coffee; make sure the dipping bowl is wide enough for the ladyfingers to fit into without squeezing or breaking them. A critical step here is not allowing the cookies to become too soggy or they will turn to mush and the structure of the dessert will be lost. You also don’t want them to be too dry, or the “cake” won’t be soft. Therefore you must work efficiently during this step. For the the right amount of absorption, dip one ladyfinger into the espresso for 2 seconds, turn it over another 2 seconds, then take it out and place it in the dish. The ladyfingers should be moist, but should not fall apart. If they do, they’re too wet. If they feel to dry, dip a little bit longer. If you dipped correctly 1 cup of espresso plus the liqueur is all you will need. See note below on espresso. If you did not use the cup of espresso, the cookies may end up being too dry. Note: if they are still crisp after laying out the first layer, spoon some espresso over the top of them before you add the next layer.
Repeat the dipping process until the bottom layer is formed.
Pour half of the cream mixture over the cookies, spreading it out so that it covers all the edges.
Top the cream layer with a cocoa powder dusting, using a sifter, ensuring the entire top is covered in chocolate.
Lay down another layer of ladyfinger cookies dipped in espresso.
Pour the remaining cream over the cookies, spreading it with an offset spatula so that the top layer, which is the final layer, is smooth.
Top with cocoa powder dusting, using a sifter, ensuring the entire top is covered in chocolate.
Let chill in the refrigerator for at least two hours, but the longer it sits, the better it will set.
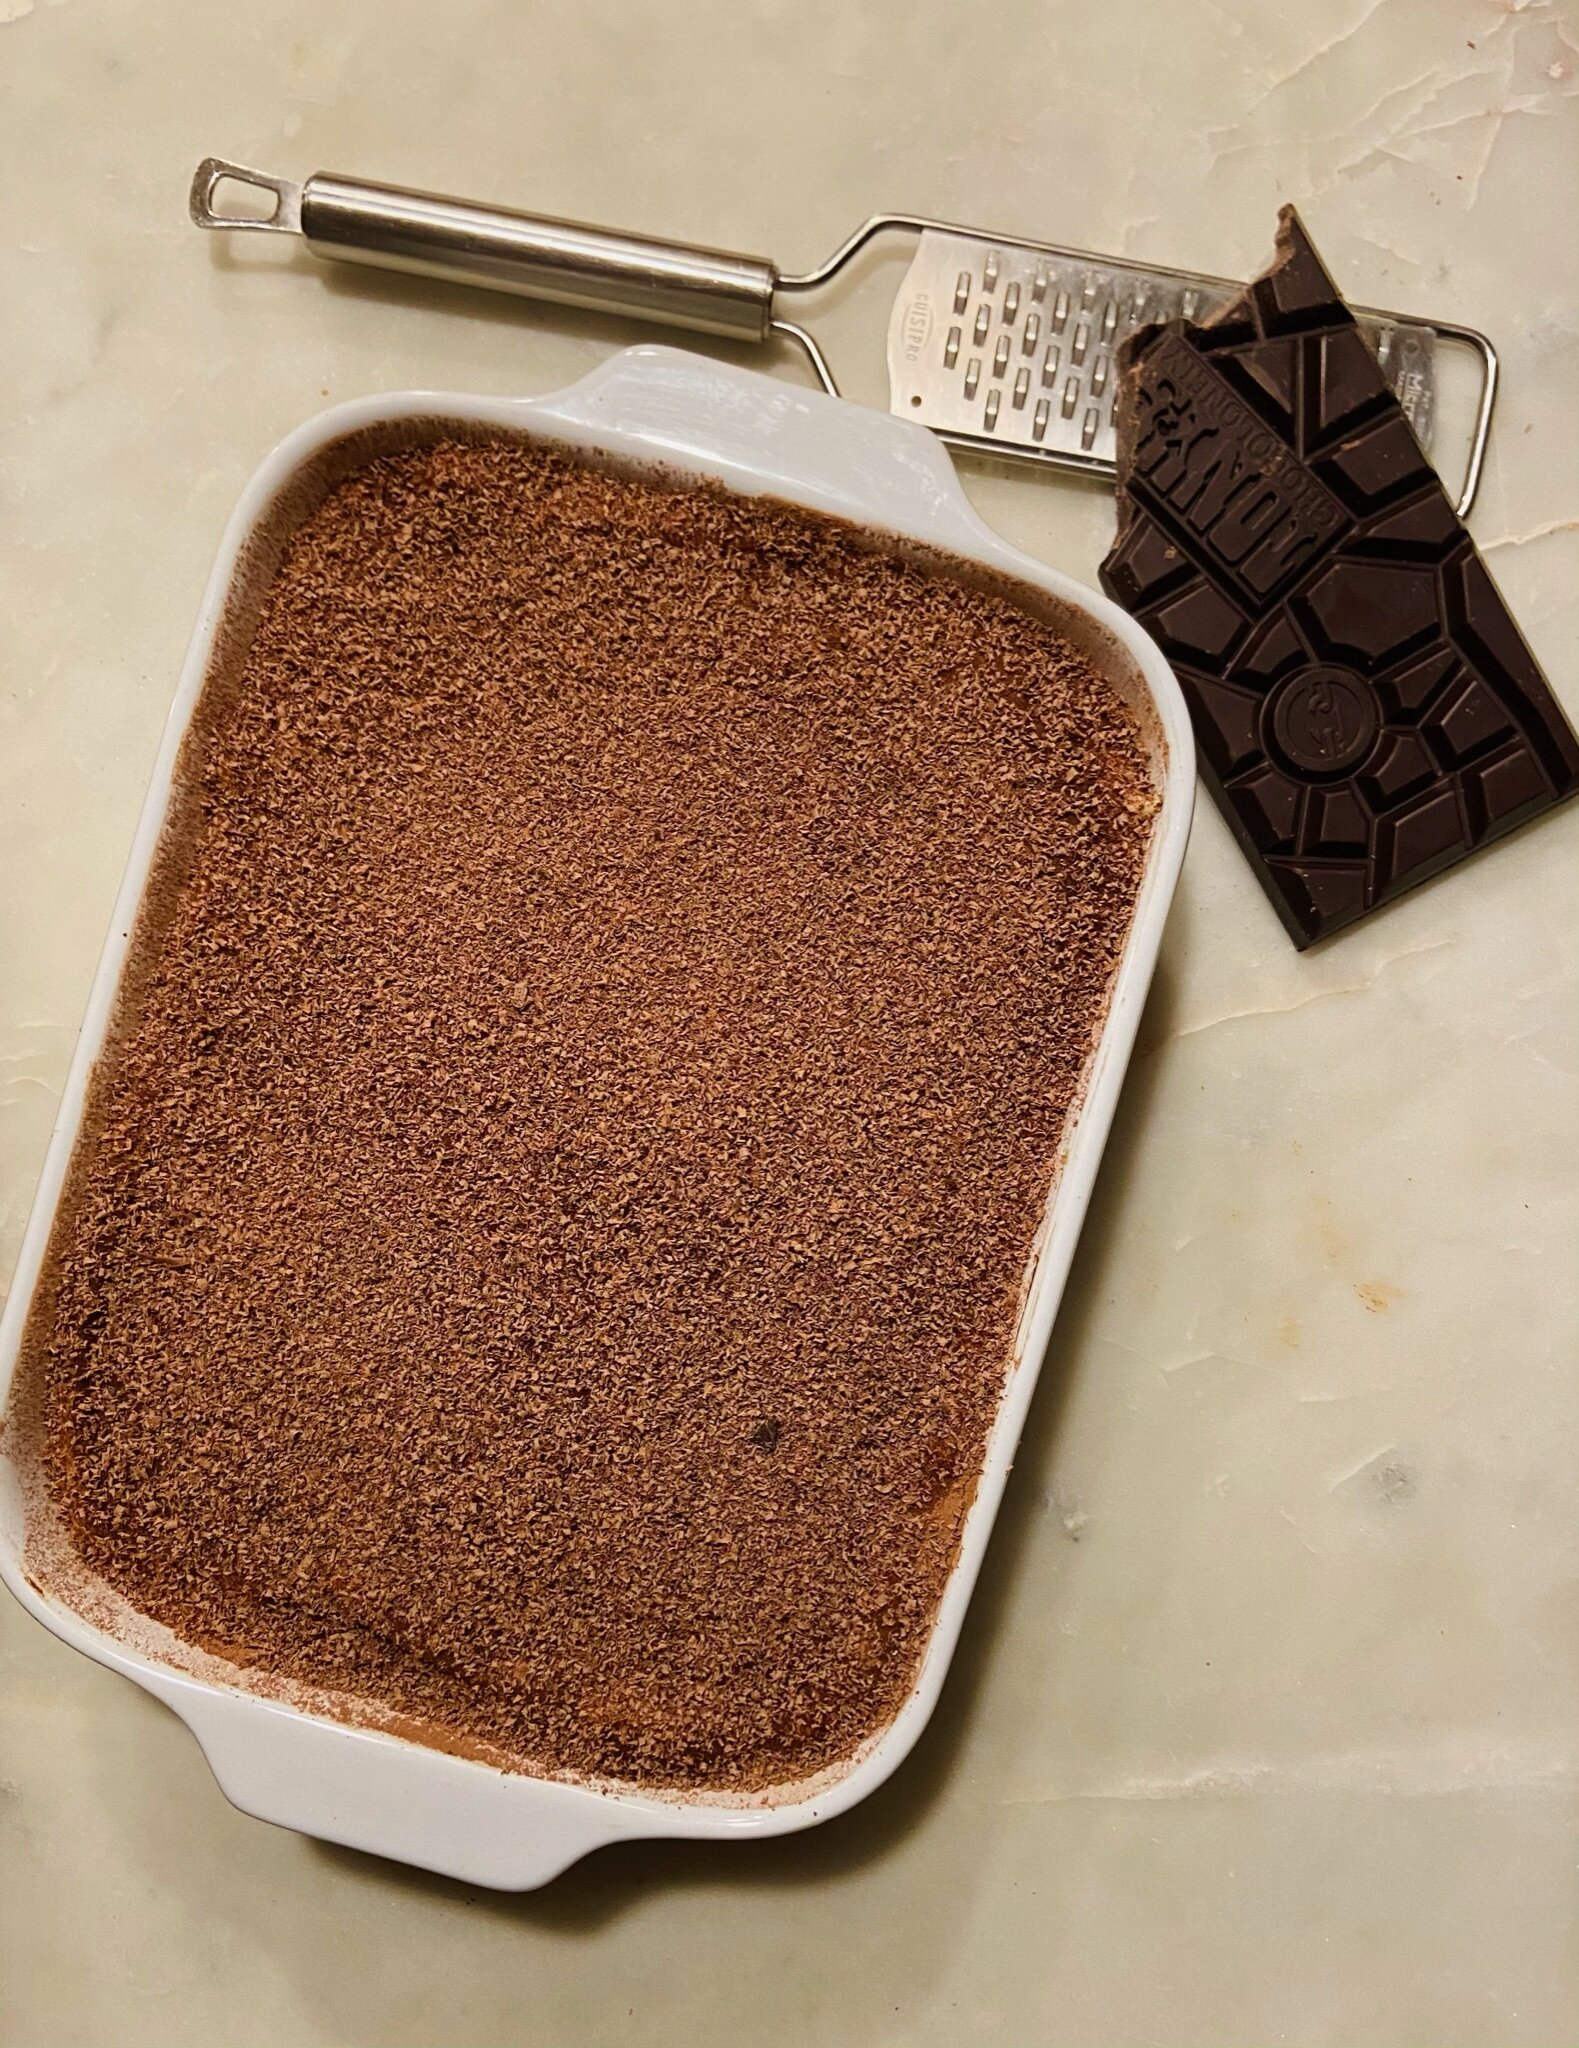
Bonus; when serving, use a micro-plane to shave dark chocolate over the top of the cocoa covered tiramisu. This gives it a nice finished look.
Note on espresso: I currently use Nespresso pods/capsules and this recipe takes about 5 capsules. If you are brewing strong coffee or using instant coffee or espresso, it needs to be thick and strong. Not just because espresso is a key element in the recipe, but because the viscosity of the coffee is also important to the structure of the dessert. If the coffee is too liquid/watery, the cookies will soak it up quickly and the result will be a wet dessert versus a moist one. It is best to add sugar when the espresso is hot, as it will dissolve quickly. If you are using a cold-brew double strength coffee like Chameleon, which works well, be sure to stir well to dissolve the added sugar.